Introduction
This week I had to program my hello-world board to do everything I wanted, with different languages. Second assignment was to read the Attiny datasheet and learn how to use it.
As most of the things I studied before, this was completely new to me, so I had to study everything from zero. However I really wanted to learn the basics of programming: also if it was pretty hard in the beginning I did something useful in the end.
Documentation
This assignment was right before the break week, so I decided to do it in 2 weeks instead of 1. I studied a lot during the first one, and I started to write something during the second one.
First I've read Make: AVR programmer since it was exactly what I needed for this week. It explained very well what a microcontroller is, how it works and what are the main differences between the pins. If you are a total beginner in this field, it is the right book for you indeed.
The second chapter was interesting for this week in particular, because it explained in a clear way how avr-gcc works and it described the several options you have if you use it from shell. Then I've found truly useful the paragraph dedicated to the toolchain. It explained pretty well what I did during week 4 and week 6, it was pretty surprising to see that I've actually understand what I did during those weeks.
Then I went for my usual tour of 2015 students. As always, Shelga's page was as clear as crystal, it was pretty useful above all for her descritpion of the data sheet.
Reading some others pages, I've found a link to a 2014 student's page, and I've found the Linda Wanders page:
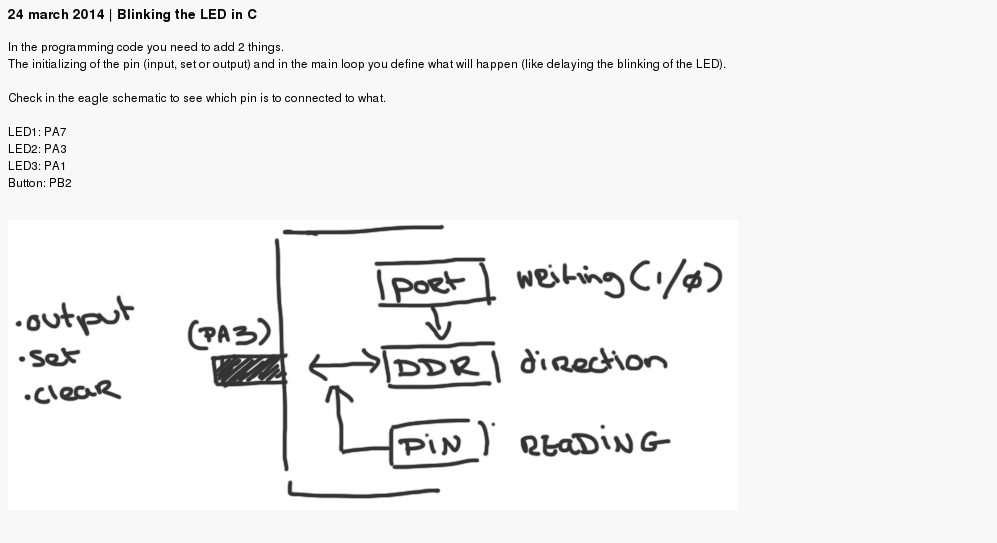
If you are an absoulte beginner like I was, this page is the best page you can find. As you can see from this image, she explained in the ditails everything she did. This part helped me a lot to understand the differences between the registers.
 She explained everything she did, why she did it and how it worked, I recommend you to read it.
In the end, to learn how C works and how to use it I studied the first and the second chapter of the c book. The C book explain eveything in truly clear way, and has some exercises in the end to test what you have read.
She explained everything she did, why she did it and how it worked, I recommend you to read it.
In the end, to learn how C works and how to use it I studied the first and the second chapter of the c book. The C book explain eveything in truly clear way, and has some exercises in the end to test what you have read.
Datasheet
I downloaded the Datasheet and I started to read it. In the first page there's an index and some general informations about the attiny family.
Thursday our instructor explained us that page, the I continued to read it. As I read in Make: avr programmer I had to find the pins connected to the button and the led of my hello-world board. So I checked the Eagle draw of my board and the page with the pins description of the datasheet:
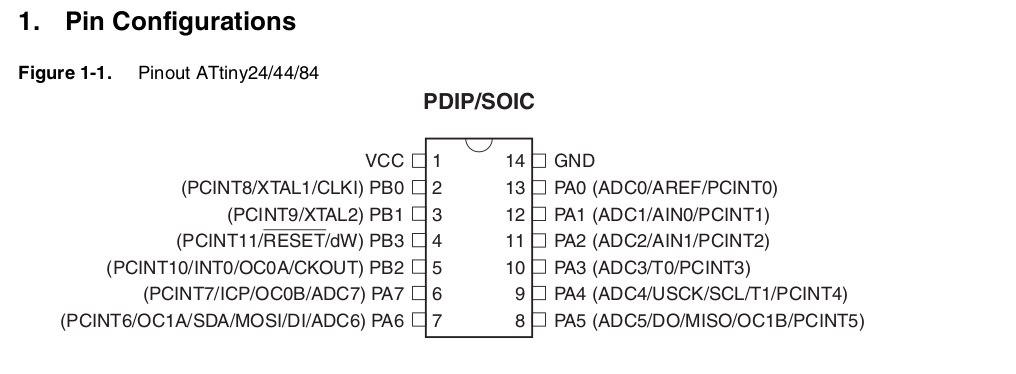
The botton of my board was connected to PB2.
The Led of my board was connected to PA7.
Then, since I needed to make them as digital ports, I looked fot that page on the document:
It explained me how it worked in general, but I needed the registers for PA7 and PB2, so I continued to read until I've found this part:
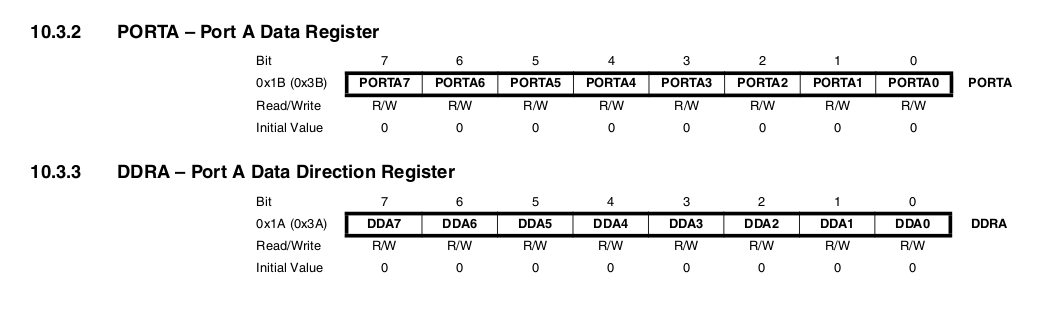 So now I knew what to do.
C
Once the c file was ready, I had to follow the toolchain to upload it on my hello-world board:
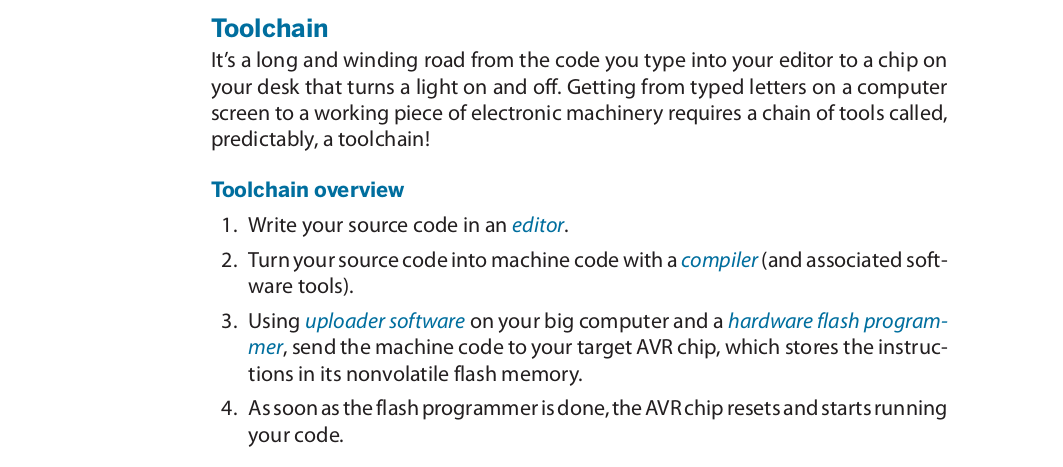
I used avr-gcc to compile it, so basically I downloaded Neil's hello-world board makefile, and I named it after my project. Then I made a folder, with that .make file, and my .c file. I opened a terminal, I went into that folder and I ran:
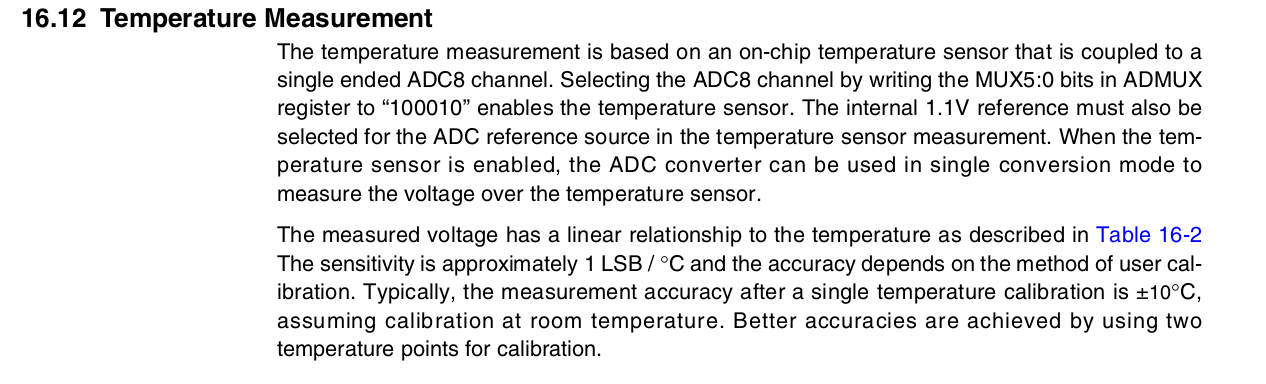
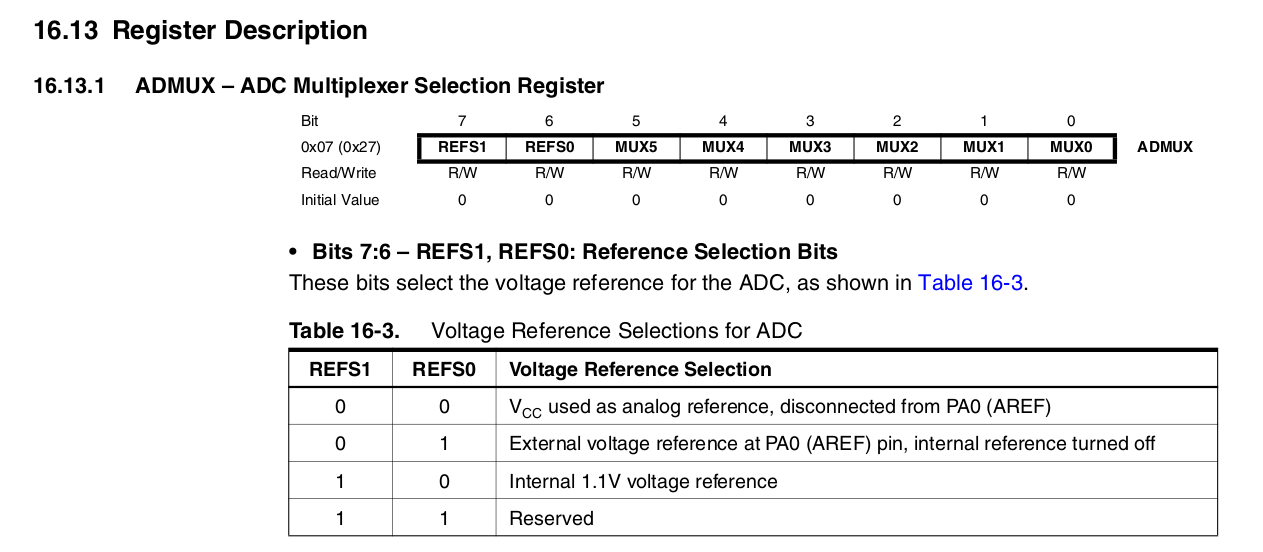
Here I've found what I had to do in order to use the temperature sensor, there's a particular procedure to follow. Then I looked for the register, their names and what do they do, as you can see:
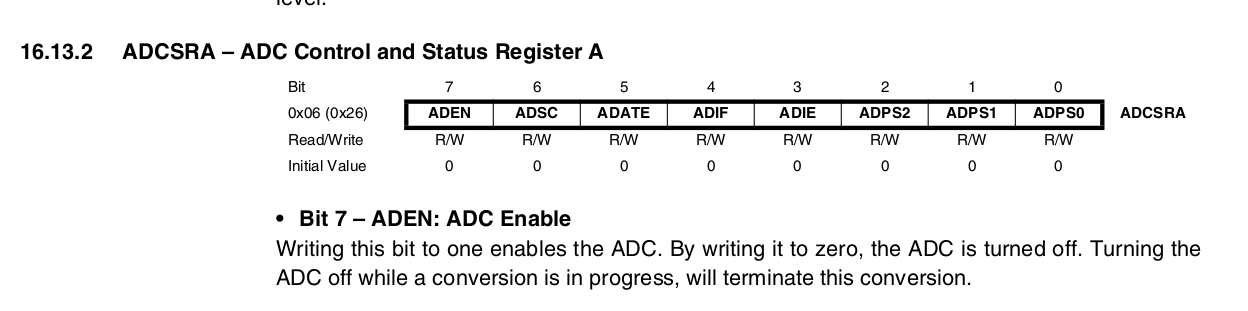
This is the last register that I edited, it allowed to enable ADC:
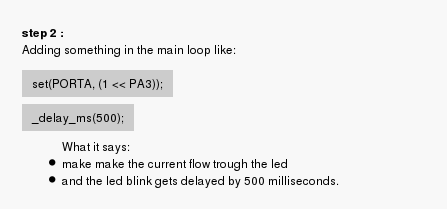
Once I wrote those parameters down, I started to write the code:
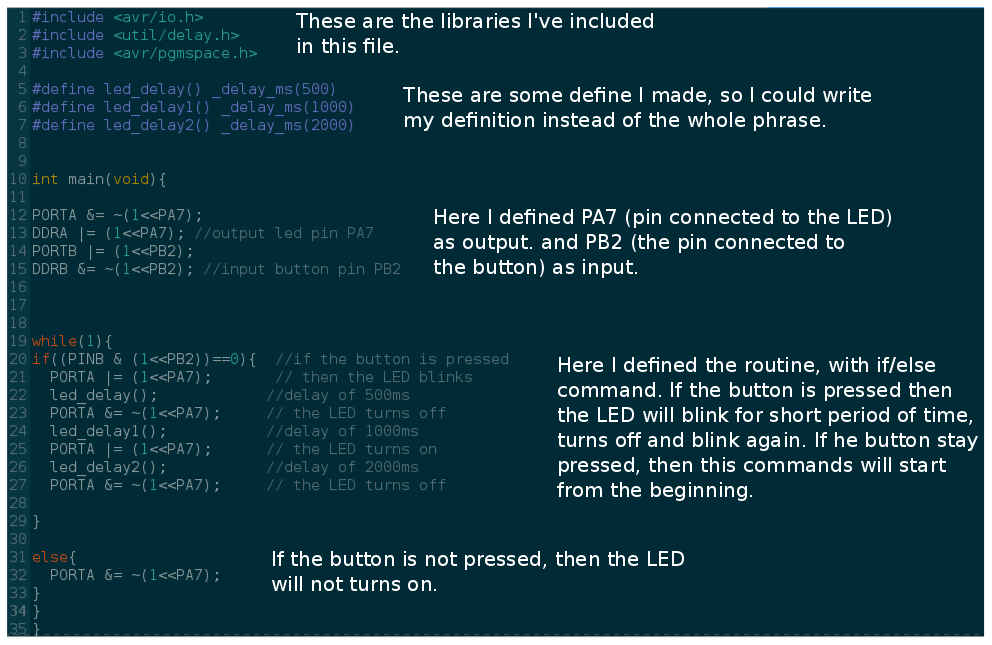
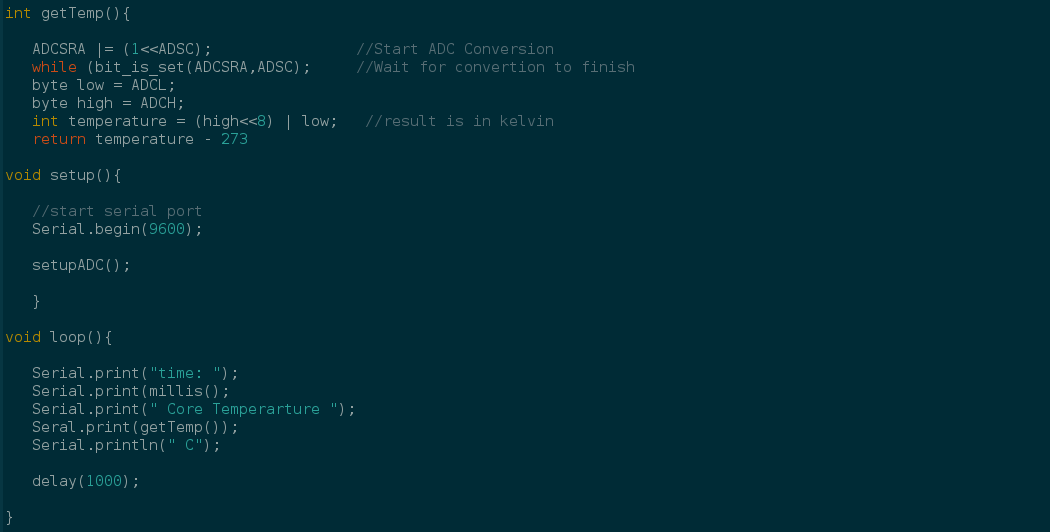
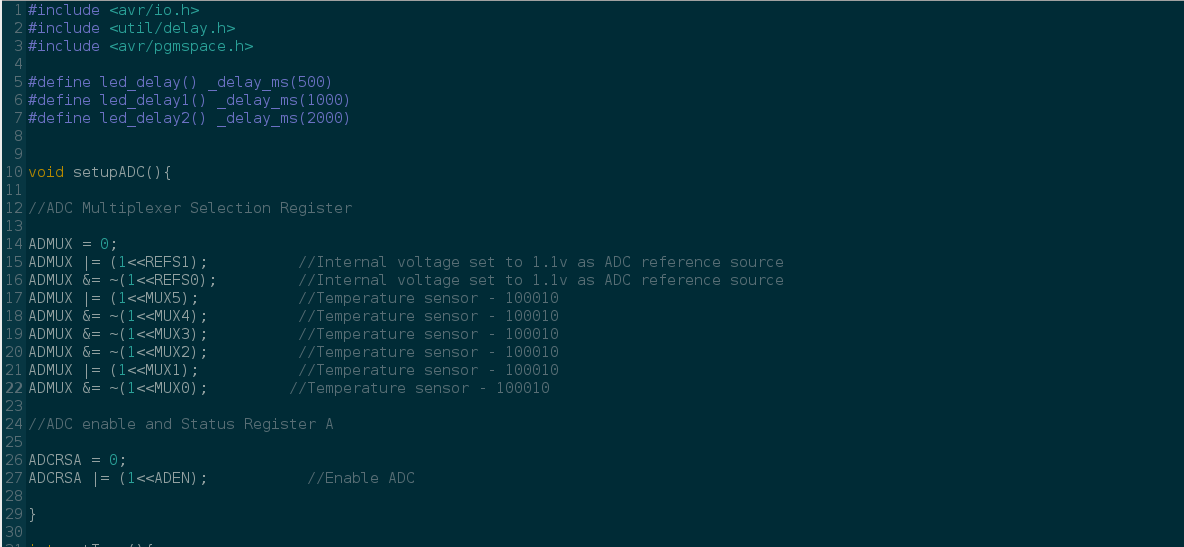 The first part of the code is almost the same as the one of the blinked file. The last part is different of course, In this image I changed the pins to do 3 things basically:
- -Set the internal voltage to 1.1v
- -Change the pins from MUX0 to MUX5 in order to write the 101000 number, that enabled the temperature sensor.
- -Write into the ADCSRA register, changing the pin of the ADEN from 0 to 1, in order to enable ADC
 As you can see, in the last part of the code I used Serial.print and Serial.println as commands. That's because I used a Arduino Micro as ISP programmer. As I wrote in some others pages, for some reason that I can't understand (I'm still looking for a solution), my PC is not able to read ISP programmer. I charged the blinked program on my board using another computer, but I'm trying to work on my pc. So I set the Arduino Micro to work as a ISP, I loaded the Attiny library and tried to upload this code.
It didn't work, I'm still working on it.
As you can see, in the last part of the code I used Serial.print and Serial.println as commands. That's because I used a Arduino Micro as ISP programmer. As I wrote in some others pages, for some reason that I can't understand (I'm still looking for a solution), my PC is not able to read ISP programmer. I charged the blinked program on my board using another computer, but I'm trying to work on my pc. So I set the Arduino Micro to work as a ISP, I loaded the Attiny library and tried to upload this code.
It didn't work, I'm still working on it.
Conclusions
This week was pretty hard, but I really wanted to learn the basics of programming since the beginning of Fabacademy. I did a really simple thing, but I'm still studying C and Bash, in order to improve my skills.
Download
Blinkled C fileTemperature C file

This work is licensed under a Creative Commons Attribution-ShareAlike 4.0 International License.